Introduction
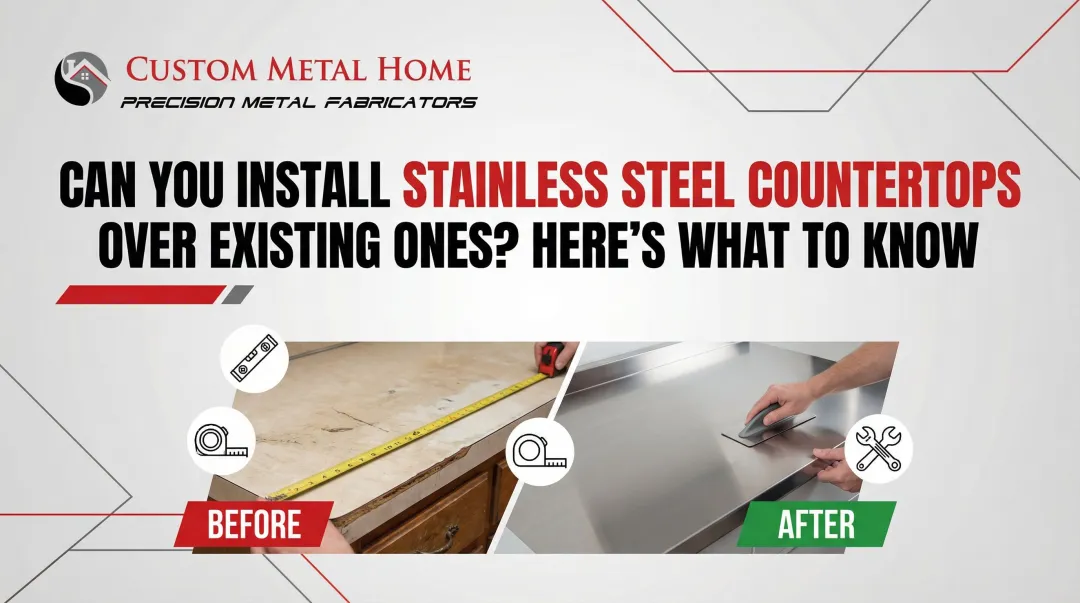
Worn, damaged, or outdated countertops are one of the most visible pain points in any kitchen. Scratches, stains, and dated laminate surfaces drag down the entire aesthetic.
Full replacement typically runs $3,000 to $10,000, takes days of disruption, and sends perfectly functional substrate material to the landfill.
Stainless steel overlays offer a durable, restaurant-tested alternative that transforms existing surfaces without demolition costs or material waste. The outcome, though, depends heavily on substrate condition, gauge selection, adhesion method, and edge treatment. A poorly executed overlay can bubble, dent, and fail within months — a properly installed one can last decades.
This guide covers the main covering options, what the installation process actually involves, which substrates work (and which don't), and the mistakes that cause most projects to fail prematurely.
Key Takeaways
- Four covering methods exist: custom sheet overlays, adhesive vinyl film, pre-formed caps, and edge trim
- The existing substrate must be flat, structurally sound, and firmly attached; soft spots or warping will cause overlay failure
- Choose 16-18 gauge steel for residential durability, brushed finish to hide fingerprints, and proper edge sealing to prevent moisture damage
- DIY options exist (film, adhesive sheets), but custom fabricated overlays deliver the most durable, professional results
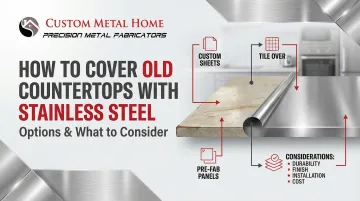
Your Options for Covering Old Countertops with Stainless Steel
There is no single "stainless steel countertop cover"—the right method depends on your budget, desired durability, and whether you want a DIY or professional solution. Here's a breakdown of each approach.
Stainless Steel Sheet Overlay (DIY or Pro-Installed)
A stainless steel sheet overlay is a thin-gauge sheet cut to fit and adhered directly over the existing countertop surface. Typical gauges range from 16 to 22, with thicker gauges (lower numbers) offering better dent resistance. Unlike a full replacement slab, overlays bond to the existing substrate rather than replacing it entirely.
Sheets are sourced from custom metal fabricators or specialty suppliers. A custom fabricator can cut to exact dimensions, integrate a backsplash, and form specific edge profiles—options that standard hardware store stock simply doesn't offer.
Stainless Steel Adhesive Film / Contact Paper
This is the most budget-friendly and DIY-accessible option—a stainless-look vinyl film applied like contact paper. Products like Con-Tact MetalFX are purely cosmetic polymers that mimic the appearance of metal but provide no structural benefit. Compared to real stainless steel, adhesive film falls short in every practical category:
- Heat resistance: rated to just 158°F — not safe near cooktops
- Scratch resistance: vinyl scratches easily with normal prep work
- Longevity: edges lift and film degrades within a few years
Use this option only for temporary aesthetic upgrades on low-wear surfaces.
Stainless Steel Countertop Caps / Pre-Formed Overlays
Pre-formed stainless steel caps are designed to fit over standard-size countertops, typically available in straight runs and simple bends. These are easier to install than custom sheets but limited in size and shape compatibility—they cannot accommodate integrated sinks, irregular curves, or complex layouts. Suppliers like Advance Tabco and specialty metal vendors offer these products for straightforward edge covering and gap filling.
Stainless Steel Edge Trim / Edging
Stainless steel edging can be used in combination with other covering methods to finish exposed edges, or as a standalone update on laminate countertops. This was common in mid-century kitchens and is still available through specialty metal suppliers. Edge trim provides a clean, finished look and can be installed without covering the entire countertop surface.
How to Install a Stainless Steel Overlay Over Old Countertops
The steps below cover bonded stainless steel sheet overlays — the most durable, permanent option. If you're using adhesive film instead, the process is simpler and closer to applying contact paper.
Step 1: Assess and Prepare the Existing Countertop
Check that the existing surface is flat with no warping, delamination, or raised edges. The substrate must be structurally sound and firmly anchored to the cabinets. Any soft spots, water damage, or movement must be repaired before proceeding—the overlay will only be as stable as the surface beneath it.
Clean the surface thoroughly to remove grease, residue, and debris. Industry standards recommend cleaning with a 70:30 mixture of isopropyl alcohol and water. Lightly sand laminate or painted surfaces to improve adhesion.
Step 2: Measure and Order Your Stainless Steel Sheet
Measure the countertop precisely—length, width, depth, and any cutouts for sinks or cooktops. Stainless steel sheets are cut to order — there's no trimming to fit once they arrive.
Specify the following with your fabricator:
- Gauge: 16-18 gauge for residential applications (see Key Factors section)
- Finish: Brushed/satin finish hides scratches better than polished
- Edge treatment: Folded edge, trim strip, or raw cut with deburring
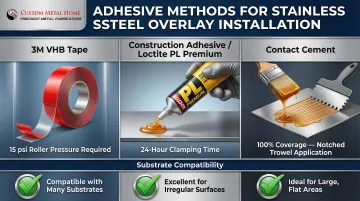
Step 3: Apply Adhesive and Set the Sheet
Adhesive selection depends on sheet thickness and substrate type:
- 3M VHB Tape: Provides immediate handling strength; apply with at least 15 psi roller pressure across the full surface
- Construction Adhesive: Loctite PL Premium bonds metal to wood or MDF effectively — plan for 24-hour clamping time
- Contact Cement: Apply a uniform coat to both surfaces using a notched trowel; 100% coverage is required for a bubble-free bond
Coat both the substrate and the back of the steel sheet. After the manufacturer's specified flash time, lay the sheet from one end and press firmly as you go. Work out any air pockets with a rubber roller or squeegee.
Step 4: Finish the Edges and Seal
Trim any overhang using aviation snips (for 18-24 gauge) or metal shears (for thicker gauges). File or deburr all cut edges to eliminate sharp hazards — tools like the Noga DB1000 deburring tool work efficiently.
Seal all seams and the backsplash junction with edge trim, a fold-over treatment, or 100% silicone neutral-cure sealant. Moisture that gets under the sheet will swell the substrate and lift the steel. Use only non-chloride sealants with NSF/ANSI 51 food-zone certification.
Key Factors to Consider Before Installing Stainless Steel Over Existing Countertops
Gauge and Thickness
Gauge determines durability and workability. Lower gauge numbers indicate thicker, heavier steel:
- 20-24 Gauge (0.024"–0.036"): Easier to handle and cut but highly susceptible to denting; not recommended for primary prep areas
- 16-18 Gauge (0.048"–0.060"): Industry standard for residential kitchens, balancing durability with workability
- 14 Gauge (0.075"): Commercial standard for heavy-duty restaurant use
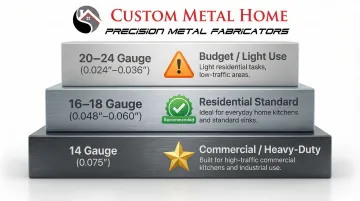
For residential countertops, 16-18 gauge provides the best balance of dent resistance and ease of installation.
Finish Type
Stainless steel finishes dramatically affect maintenance and appearance:
- Brushed/Satin (#4 finish): Features subtle linear grain patterns that reduce reflectivity and naturally hide fingerprints, smudges, and minor scratches; recommended for home kitchens
- Polished/Mirror (#8 finish): Highlights every fingerprint, dust particle, and micro-scratch; requires constant maintenance
- Embossed: Textured patterns that add visual interest but can trap debris in grooves
Always wipe brushed finishes parallel to the grain to naturally conceal daily wear.
Added Counter Height
Laying stainless steel sheet over an existing countertop adds height equal to the gauge thickness—typically 1/16" to 1/8". This may affect:
- Sink fit and alignment
- Appliance fit (especially slide-in ranges)
- Gap between counter and upper cabinets
Check these clearances before ordering to avoid fit issues.
Heat and Chemical Resistance
Stainless steel handles heat well and is safe for hot pans. However, prolonged exposure to extreme localized heat (direct flame) will cause "heat tint" discoloration. For 304 stainless steel, oxidation discoloration begins around 554°F and progresses to dark blue at 1112°F.
Chemical restrictions:
- Never use: Bleach, chloride-based cleaners, or carbon steel wool—these strip the protective chromium oxide layer and cause pitting and rust
- Use only: Warm water, mild dish detergent, or dedicated stainless steel cleaners
Substrate Compatibility
The substrate is the foundation of any overlay system. Compatible substrates include:
- Flat laminate countertops (no peeling, bubbling, or soft spots)
- MDF or plywood (provides sound deadening and structural support)
- Solid, level surfaces with no height variation
Not every surface qualifies, though. Problematic substrates include:
- Textured tile (uneven surface telegraphs through steel)
- Warped wood (prevents proper adhesive bond)
- Damaged surfaces with soft spots or delamination
A flat, solid substrate is the single most important compatibility requirement. Stainless steel will mirror any underlying imperfection.
Common Mistakes When Covering Countertops with Stainless Steel
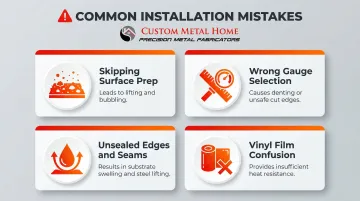
A few missteps account for most failed installations. Avoid these before you commit to any method:
- Skipping surface prep — Grease residue, soft spots, or delamination will cause adhesive to fail, leading to lifting and bubbling. Clean thoroughly and repair substrate damage first.
- Wrong gauge for the job — 20-24 gauge dents easily in high-traffic kitchens; 16-18 gauge is the right call for residential countertops. Too-thick steel without proper cutting tools creates jagged, unsafe edges.
- Unsealed edges and seams — Water infiltrating under the sheet at backsplash seams or near sinks causes the substrate to swell and the steel to lift. Seal all edges with 100% silicone neutral-cure sealant.
- Mistaking vinyl film for real stainless steel — Film products lack the heat resistance and durability of actual metal. They work for temporary aesthetic updates, not functional prep surfaces.
When Stainless Steel Is (and Isn't) the Right Choice
Stainless steel overlays make the most sense in these scenarios:
- Kitchens needing high heat resistance near cooking areas
- Commercial-style or professional home kitchens
- Situations where the existing countertop is structurally solid but cosmetically worn
- Homeowners wanting a durable, hygienic, permanent solution
Stainless steel is not the best fit when:
- The existing countertop has significant damage, warping, or height variation (full replacement is better)
- Households are highly sensitive to noise (stainless steel amplifies impact sounds from pots and utensils)
- Homeowners prefer a warm or traditional aesthetic (stainless has a distinctly industrial/modern look)
- Budget is extremely limited and cosmetic appearance is the only goal (film may suffice)
Alternatives like laminate overlay, tile-over, or concrete skim coat are worth considering if stainless doesn't fit your situation. The next step is understanding your installation options — and what each one actually requires.
Frequently Asked Questions
How can I cover my countertop without replacing it?
Main options include stainless steel overlay sheets, adhesive stainless-look film, laminate covers, tile-over, and paint/refinishing kits. Your best option depends on how much you're spending, how long you need it to last, and the current condition of the surface.
Can you put a countertop over an existing countertop?
Yes, but only if the existing countertop is flat, structurally sound, and firmly attached. Added height must be accounted for when checking sink fit and appliance alignment. Any damage to the substrate should be repaired first.
How much does a countertop overlay cost?
Adhesive film runs $9–$40 per roll, pre-formed stainless steel caps cost $35–$85 per square foot, and custom fabricated sheet overlays range from $80–$215 per square foot installed. Professional installation adds to each of these totals.
Is stainless steel a good choice for a countertop overlay?
Stainless steel is durable, hygienic, heat-resistant, and delivers a professional look. However, it shows fingerprints, can dent if too thin, adds an industrial aesthetic, and amplifies noise. It works best in high-use kitchens where durability matters more than a quiet, fingerprint-free surface.
What thickness of stainless steel should I use for a countertop overlay?
Use 16-18 gauge for residential countertop overlays. Thicker gauges (lower numbers) are more durable but harder to cut and install at home. Avoid 20-24 gauge for primary prep areas due to denting risk.
Can stainless steel be applied over laminate countertops?
Yes, laminate is one of the best substrates for stainless steel overlays because it is typically flat and smooth. The laminate must be in good condition with no peeling, bubbling, or soft spots before applying the overlay.